

A Transit Custom can quickly become difficult to work from when tool cases are stacked on the floor, fixings roll under the bulkhead and the item you need is always at the back. Proper Transit Custom shelving gives everything a fixed place, making the load area quicker to use between jobs and easier to keep tidy at the end of the day. The right setup is not about filling every panel with timber. It is about carrying the tools and materials you use most without wasting floor space or making the van awkward to load.
For electricians, plumbers, joiners and maintenance engineers, a simple side-racking unit is often enough to make a major difference. Larger teams or trades carrying a wider mix of stock may need shelving on both sides, with a clear centre aisle for longer materials. The best layout depends on how you work from the van, not simply how much equipment you own.
Start with your Transit Custom specification
Before choosing shelving, confirm the exact van you have. Ford Transit Custom models vary by wheelbase, roof height, generation and internal dimensions. A unit made for a short-wheelbase van may not use the available length correctly in a long-wheelbase model, while changes around wheel arches and body shape can affect fitment.
Check your vehicle’s wheelbase first, then measure the load space if you are unsure. Take note of the side door position, bulkhead, wheel boxes and any existing ply lining. If you have a newer Transit Custom, do not assume racking intended for an earlier version will fit without checking the listed vehicle compatibility.
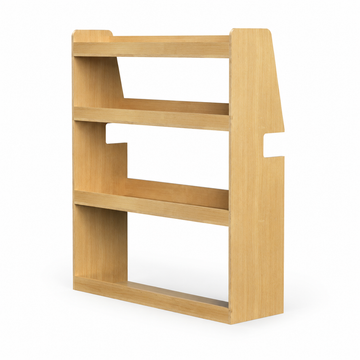
Vehicle-specific shelving is usually the straightforward option because it is designed around the van’s internal shape. A universal three-shelf unit can suit a broader range of vehicles or a more flexible layout, but you should still compare its width, height and depth with the usable area in your van. A few minutes spent checking dimensions is preferable to receiving a unit that compromises access or loading space.
Choose Transit Custom shelving around your work
Think about what comes in and out of the van every day. Heavy power tools, cases and frequently used consumables need low, accessible positions. Lighter items, such as sealants, cable clips, gloves or boxed fittings, can sit higher up. Keeping regularly used stock where you can see it avoids unloading half the van to find one small part.
A single shelving unit on the nearside or offside works well for many sole traders. It leaves a broad floor area for tool bags, pipe, boards, ladders or occasional bulky deliveries. Double-sided racking provides more organised storage but narrows the central loading route. That trade-off matters if you regularly carry sheet material, boilers, lawn equipment or long lengths of conduit.
Shelf depth is another practical consideration. Deep shelves hold more, but they can encourage overloading and make smaller items harder to reach. Shallower shelves keep fasteners and hand tools visible, particularly when combined with storage boxes. There is no benefit in gaining capacity if the van becomes a collection of hidden piles.
Plywood shelving is a sensible choice for a working van. It is strong, economical and easy to live with. Flat-packed slot-together units are also practical for DIY fitting, as they can be assembled in the load area or beside the van before installation. The finished result should feel secure and functional rather than overcomplicated.
Protect the van before fitting racking
Shelving works best when it is fitted to a properly protected load area. Ply lining protects the van’s interior panels from knocks, scratches and abrasion caused by moving tools and materials. It also provides a more suitable surface for securing racking than thin exposed body panels alone.
At a minimum, consider side wall lining where the shelving will be fixed. Full ply lining gives a cleaner, more durable working space and helps protect resale value, especially if the van is on finance or likely to be replaced in a few years. A ply floor is also worthwhile if you drag cases, boxes or machinery in and out regularly.
Lining and racking should be planned together. Fitting a shelving unit first and adding lining later can mean unnecessary removal work. If the van is empty, it is generally easier to line it, mark out the proposed layout and then install the racking.
Keep weight low and balanced
A well-organised van is not automatically a lightly loaded van. Shelves make it easy to carry extra stock, spare parts and duplicate tools, so it is worth checking payload before you commit to a fully loaded setup. Include the weight of lining, racking, tools, materials, passengers and fuel when considering what the van can legally carry.
Place the heaviest items low down and avoid concentrating all of the load on one side. A lopsided van can affect how it feels on the road, particularly when cornering or braking. Secure heavy cases and loose equipment so they cannot shift during travel. Shelving keeps items organised, but it does not remove the need to load safely.
What is needed for a secure DIY installation?
A flat-packed shelving system is designed to be manageable for a competent DIY installer, but the fitting stage should not be rushed. Assemble the unit square and on level ground where possible. Dry-fitting the parts before applying glue helps you understand the layout and confirms that each slot is fully seated.
Purpose-made fitting hardware is important. Use the correct brackets, bolts and fixings for the racking and van structure rather than improvising with whatever is in the toolbox. Pilot drilling tools and the correct drill bit help produce clean, accurate fixing points, while PVA glue strengthens the assembled plywood joints where specified.
Before drilling, position the unit in the van and check that rear doors, side doors and the bulkhead can be used as intended. Make sure shelves are level, wheel arches are clear and there is enough space to remove the cases you plan to store. Mark fixing points carefully. You only get one chance to avoid drilling in the wrong place.
Once installed, pull and press against the racking to check for movement. Recheck fixings after the first few days of use, particularly if the van works over rough sites or carries heavy equipment. A quick inspection during routine vehicle checks is time well spent.
Set shelves up so they stay useful
The first arrangement is rarely perfect. Use the van for a week or two, then move stock according to what you actually reach for. If sealants are constantly being placed on the floor because the shelf is too high, change the arrangement. If tool cases are blocking access to fixings, give consumables their own clear section.
Small storage bins, labelled boxes and case stops can make open shelving far more effective. Labels do not need to be elaborate. Clear names for electrical fittings, plumbing parts, screws, blades or PPE stop stock being mixed together and make it easier to see what needs replenishing.
Avoid turning every shelf into permanent storage for items used once a month. Seasonal equipment and rarely needed tools can take up valuable space. Keeping the daily working kit accessible is what makes the setup pay off in time saved at every job.
For a straightforward DIY route, 888VanRacking supplies vehicle-specific plywood systems, universal shelf units and the fitting accessories needed to complete the job. Confirm compatibility, allow time for assembly and fit the unit properly rather than trying to force a layout that does not suit the work you do.
A good van setup should make the first job of the morning easier, not merely look tidier when the doors are open. Start with the equipment you use every day, leave room for the loads that pay the bills, and build the shelving layout around that reality.
Shop Transit Custom shelving
Choose MK1 or MK2, then check the listed years, side and dimensions. These are shelving units; ply-lining kits are not included.

Unsure about fit? Send us your van details and measurements.