

A van can be full and still be badly set up. If you are lifting cases over loose tools, hunting for a box of fixings or moving stock around before every job, the problem is not a lack of space. It is trade van organisation that has not been planned around the work you actually do.
For most trades, the best layout is not the one with the most shelves. It is the one that keeps daily-use equipment secure, visible and easy to reach, while leaving enough clear floor space for the awkward items that change from job to job. A practical racking system, fitted properly to a lined load area, turns the back of the van into a working space rather than a moving pile of gear.
Start with the work you carry
Before measuring the van or choosing a racking unit, look at a normal working week. An electrician carrying tester cases, cable reels, trunking and boxes of accessories needs a different setup from a joiner transporting power tools, hand tools, sheet materials and occasional lengths of timber. A plumber may need secure spaces for pipe fittings, sealants and tool cases, with floor room left for boilers or cylinders.
Separate your load into three groups: equipment used at nearly every call, items needed only for particular jobs, and larger materials that need an open floor. The first group should sit between waist and shoulder height where possible. The second can go on higher or lower shelves. The third should determine how much floor area you protect and keep clear.
This approach avoids a common mistake: buying shelving first, then trying to force every tool and material into it. Van racking should fit the work, not dictate it.
Think about access at the job
Consider where you usually open the van. If you work mostly from the rear doors, regularly used boxes should be accessible from the back. If you often park alongside a property or work from the sliding side door, it may be more useful to keep fast-moving consumables and grab cases nearer that opening.
There is a trade-off. Rear access suits longer items and a clear central aisle, while side access can speed up small, frequent jobs. A two-sided racking layout can give plenty of storage, but it narrows the usable floor. For builders and installers carrying bulky loads, single-side racking is often the more sensible option.
Build trade van organisation around the vehicle
A racking unit that looks right in a photograph is no use if it is not made for your van’s wheelbase, roof height or side-panel shape. Check the exact vehicle model before ordering, including whether it is a short or long wheelbase version and whether the available unit suits the load area you have.
Vehicle-specific side racking is designed to use the contours of a particular van more efficiently. This matters in vans with wheel arches, shaped panels or restricted rear openings. Universal three-shelf units can be a useful alternative where a model-specific layout is unavailable or when you want flexible storage in a smaller vehicle.
Measure your load area even when you know the model. Check the distance from the rear doors to the bulkhead, the width between wheel arches and the height beneath the roof. Also allow for existing ply lining, bulkhead fittings, internal lights and any other additions already in the van. A few minutes with a tape measure is easier than adapting a layout after it arrives.
Keep the load balanced
Organisation is also about how the van drives. Heavy tool cases, generators, boxes of fixings and machinery should sit low down and as close to the vehicle’s centre line as practical. Do not load all the weight on one side simply because that is where the shelves are.
A well-planned system lets you store lighter consumables on upper shelves and heavier equipment on the floor or lower shelf levels. It reduces the chance of items shifting through corners and helps avoid unnecessary strain when unloading. Check your vehicle’s payload as well. Racking, lining, tools, stock and materials all count towards it.
Line the load area before fitting racking
Ply lining is not just there to make the inside look tidy. It protects the van’s panels from knocks, helps provide a sound base for fitting and makes the load area easier to maintain over time. Unlined metal panels soon pick up dents, scrapes and vibration marks when tools and materials are moved in and out every day.
A lined floor provides a more durable surface under cases, boxes and heavy equipment. Side and door panels protect the bodywork where ladders, pipe, timber and loose loads are most likely to catch. If you are fitting shelving to the side of the van, plan the lining and racking as one job rather than treating them as separate upgrades.
It also makes future changes easier. When a trade changes, or the van moves to another member of the team, a protected load area is in better condition and gives you a more useful base for altering the setup.
Choose shelves for real equipment, not loose promises
Plywood racking works well for trade vans because it is practical, repairable and straightforward to assemble. Flat-packed slot-together units are especially useful for people who want a proper system without the cost of a full professional conversion. But the layout still needs to match what will sit on it.
Measure your largest regular cases before deciding shelf spacing. Tool cases should slide in and out without catching on the shelf above. Boxes of screws, clips, fittings and sealants need a lip or secure position so they do not work loose in transit. Long, narrow items may need a dedicated channel rather than being balanced across general shelving.
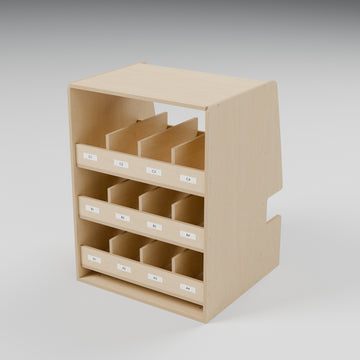
Avoid filling every shelf to its full depth just because the space is available. A shallow shelf near the rear can be more useful than a deep shelf packed with items you cannot see or reach. Store similar items together and give each section a clear purpose: electrical accessories, plumbing fittings, drill cases, hand tools or site consumables. That makes restocking at the end of the day far quicker.
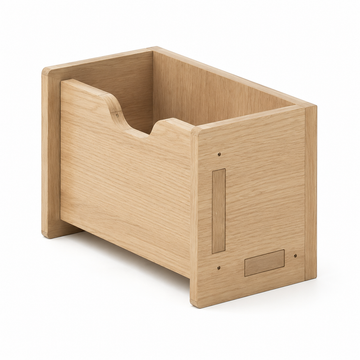
For small parts, use durable labelled boxes or organisers that can be removed and carried to the work area. Labels should be readable from the rear doors, not hidden inside the shelf. If several people use the vehicle, simple labelling is even more valuable. It prevents stock being put back wherever there happens to be a gap.
Fit the system securely
A racking unit is only as good as the way it is fixed. A loaded shelf that moves under braking is a safety issue, not just an inconvenience. Use purpose-made fitting hardware suitable for the installation, and follow the assembly and fitting instructions for the unit and vehicle.
For a DIY plywood installation, prepare the job before starting. You will normally need the correct fixing kit, PVA wood glue for the assembly joints where specified, a drill and suitable pilot-drilling tools. Dry assemble the parts first, check the unit is square and confirm door clearance before committing to final fixing.
Do not guess where to drill. Take care around wiring, vehicle structure and any factory fittings behind the panels. If you are unsure about a fixing point or have a more complex custom requirement, get advice before drilling into the van. It is cheaper to pause than to repair damaged bodywork or wiring.
Once fitted, test the setup with the equipment you genuinely carry. Open and close both rear and side doors, pull cases from each shelf and check that nothing obstructs access. Drive the van, then recheck fixings after the first few journeys. Wood joints, fittings and loaded shelves can settle slightly, particularly when the van is used on rough sites.
Make restocking part of the routine
The best organised van will gradually become disorganised if there is no reset at the end of a job. Take two minutes before leaving site to return core tools to their allocated spaces and separate rubbish, empty packaging and damaged consumables. It keeps the next morning from starting with a search.
A weekly check is useful for replacing common fixings, cleaning out sawdust and offcuts, and making sure heavier items have not migrated onto upper shelves. It is also a good time to inspect racking fixings and lining for damage. Small repairs are far easier before a loose panel or damaged shelf turns into a larger problem.
888VanRacking systems are designed to give tradespeople a clear, practical route from selecting a compatible unit to assembling and fitting it themselves. The right layout will not make tools lighter or jobs shorter, but it will make the working day less wasteful. Give every regular item a place, leave room for the loads that change, and your van will be ready when the next job comes in.
Give small parts a place of their own
Compare the unit dimensions with your available space and check suitable mounting points before ordering.
Unsure about fit? Send us your van details and measurements.